Welcome to the Meetrix vLLM developer guide for AWS! vLLM is a high-throughput inference and serving engine for large language models. It uses PagedAttention to pack the KV cache tightly, which lets it serve many concurrent requests with low latency, and it exposes an OpenAI-compatible HTTP API so existing OpenAI SDKs and tools work against your own self-hosted model.
With the Meetrix pre-configured AMI, you can deploy a production-ready vLLM instance on your own AWS account in minutes using a CloudFormation stack. This guide walks you through finding the product on AWS Marketplace, launching a GPU stack, choosing a model, pointing DNS and issuing SSL, and calling the API.
Prerequisites
Before you get started with the vLLM AMI, ensure you have the following prerequisites:
- Basic knowledge of AWS services, including EC2 instances and CloudFormation.
- An active AWS account with permission to create EC2, VPC, IAM, and CloudFormation resources.
- An existing EC2 key pair for SSH access to the instance.
- A GPU vCPU quota high enough to launch a G-family instance in your chosen region.
- Optionally, a domain name and a Route53 hosted zone if you want automatic SSL.
- Optionally, a Hugging Face access token if the model you want to serve is gated or private.
- If you encounter a vCPU quota error when launching the stack, follow https://meetrix.io/blogs/increase-aws-vcpu-quota/ to increase your vCPU limit.
What You Get
The AMI ships a fully wired vLLM stack so you do not have to assemble the GPU toolchain yourself:
- vLLM serving an OpenAI-compatible API, running as a container on Ubuntu 26.04 LTS.
- NVIDIA drivers, CUDA, and the container GPU runtime pre-installed and matched to the G-family GPU.
- Nginx reverse proxy for HTTP and HTTPS, tuned for streaming token responses.
- Automatic SSL via Let's Encrypt when a domain is supplied and its DNS points at the instance.
- Interactive API documentation at
/docs(Swagger UI) and/redoc(ReDoc). - A pre-hardened base image with ufw, unattended-upgrades, and the SSM agent.
Launching the AMI
Step 1: Find and Select the vLLM AMI
- Log in to your AWS Management Console.
- Navigate to the vLLM listing in AWS Marketplace.
Step 2: Initial Setup & Configuration
- Click the "Continue to Subscribe" button.
- After subscribing, accept the terms and click "Accept Terms".
- Wait a few minutes until processing completes, then click "Continue to Configuration".
- Select "CloudFormation script to deploy vLLM" as the fulfillment option and choose your region. Click "Continue to Launch".
- From the "Choose Action" dropdown, select "Launch CloudFormation" and click "Launch".
Create the CloudFormation Stack
Step 1: Create a stack
- Ensure the "Template is ready" option is selected under "Prepare template".
- Click "Next".
Step 2: Specify stack options
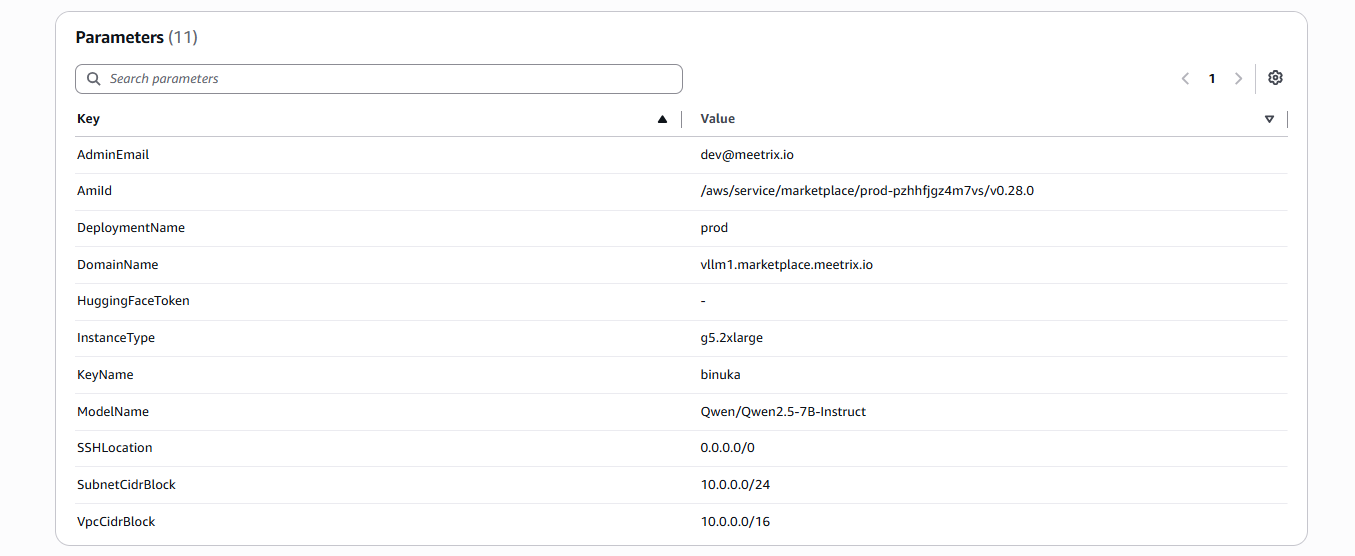
Provide a unique "Stack name", then fill in the stack parameters:
- AmiId - pre-filled automatically from AWS Marketplace. Leave this as the default value.
- InstanceType - the EC2 instance type. This must be a GPU instance (Recommended: g5.2xlarge).
- ModelName - the Hugging Face repository ID of the model to serve, for example
Qwen/Qwen2.5-7B-Instruct. Pick a model that fits in your instance's GPU memory. - HuggingFaceToken - a Hugging Face access token. Required only for gated or private models; leave the default if your model is public.
- KeyName - your preferred EC2 key pair, used for SSH access.
- DomainName - the public domain for your vLLM API (for example
vllm.yourdomain.com). Leave the default if you want to access the instance by IP address instead. - AdminEmail - the email address used when requesting the Let's Encrypt SSL certificate.
- SSHLocation - set to
0.0.0.0/0, or restrict it to your own IP range. - DeploymentName - a short identifier for this deployment (for example
prod). Useful when you run more than one stack. - SubnetCidrBlock - keep as
10.0.0.0/24. - VpcCidrBlock - keep as
10.0.0.0/16.
Click "Next".
Step 3: Configure stack options
- Choose "Roll back all stack resources" and "Delete all newly created resources" under "Stack failure options".
- Click "Next".
Step 4: Review
Review and verify the details you've entered. Here's an example of a completed set of stack parameters:
Tick "I acknowledge that AWS CloudFormation might create IAM resources with custom names", then click "Submit".

Afterward, you'll be directed to the CloudFormation stacks page. The stack itself creates in a few minutes, but vLLM then downloads the model weights and loads them onto the GPU on first boot, so the API can take 5-15 minutes more to answer depending on model size.
Point DNS to Your vLLM Server
Skip this section if you kept the default domain and plan to use the Elastic IP directly.
Step 1: Get the Stack Outputs
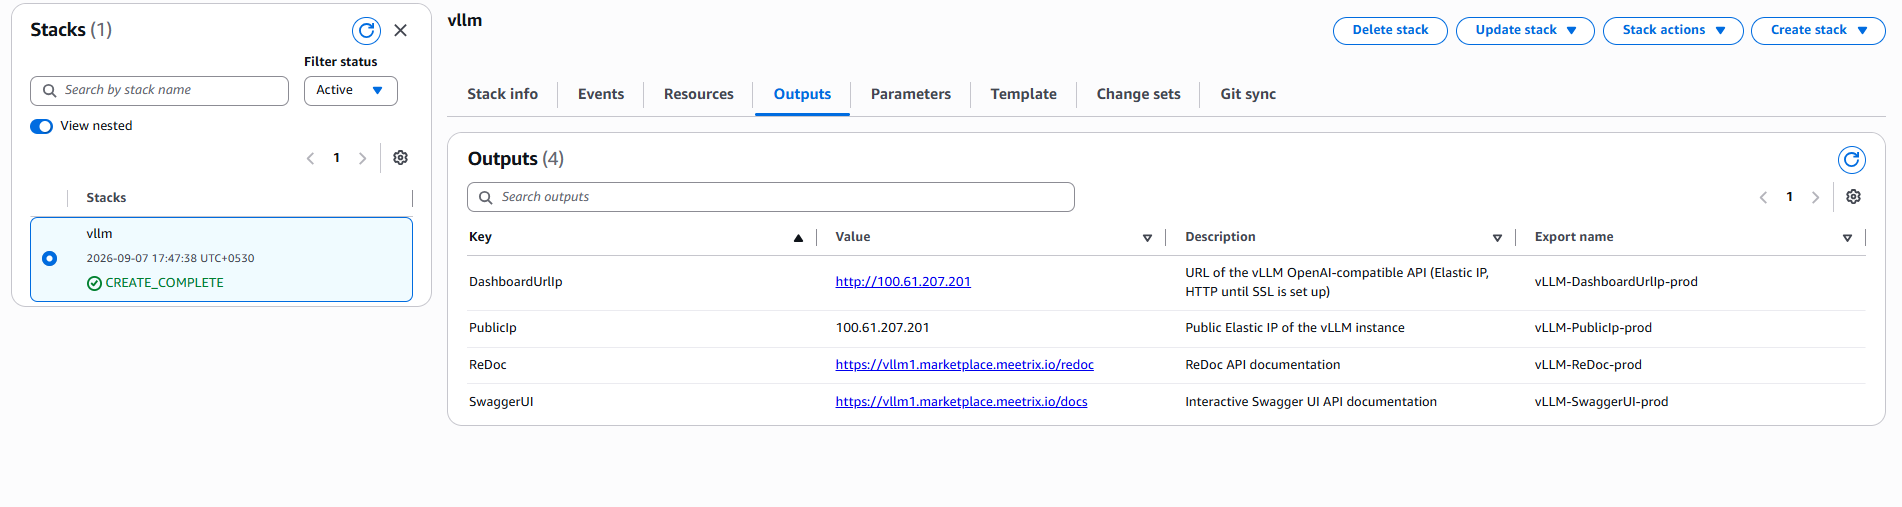
Open the "Outputs" tab of your stack. You'll see four values:
- DashboardUrlIp - the HTTP API URL at the Elastic IP, usable until SSL is set up.
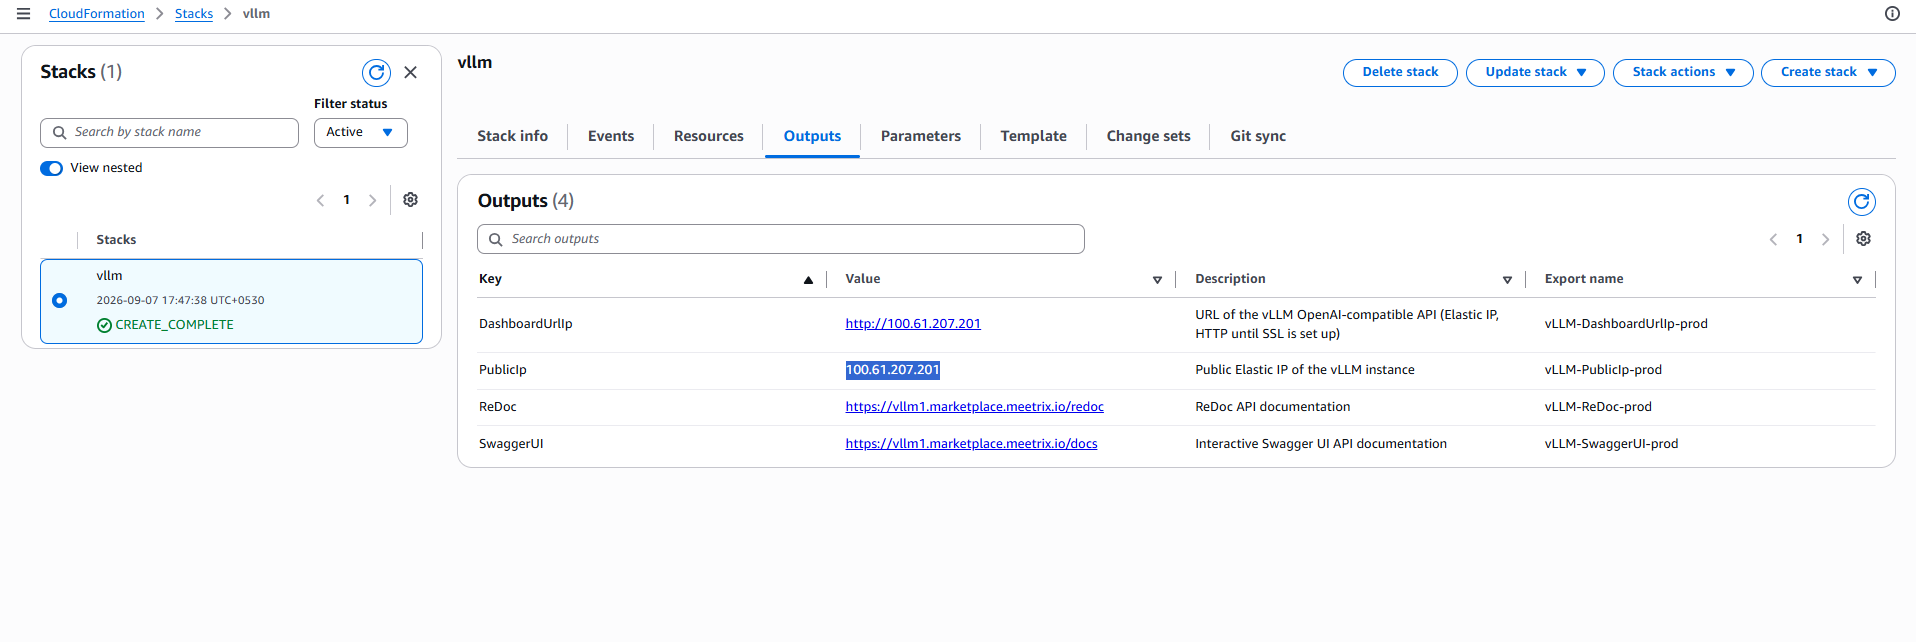
- PublicIp - the public Elastic IP of the vLLM instance.
- SwaggerUI - the interactive Swagger UI API documentation at
/docs. - ReDoc - the ReDoc API documentation at
/redoc.
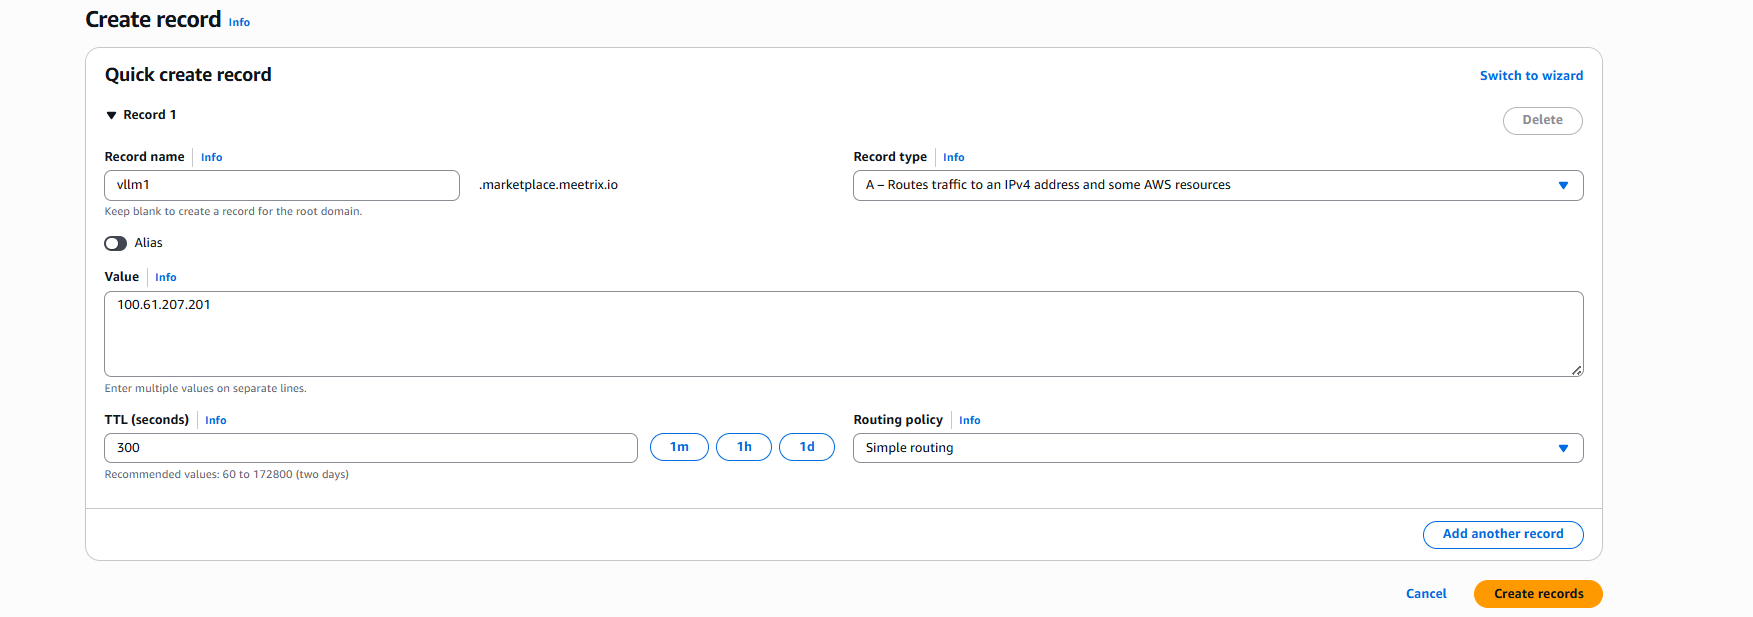
Step 2: Create a DNS Record
- Copy the value labeled "PublicIp".
- Go to AWS Route 53 and navigate to "Hosted Zones".
- Click Create record.
- Add a record name matching the domain you set in DomainName, and paste the copied PublicIp into the value textbox.
- Click "Create records".
Automatic SSL
Access the vLLM API
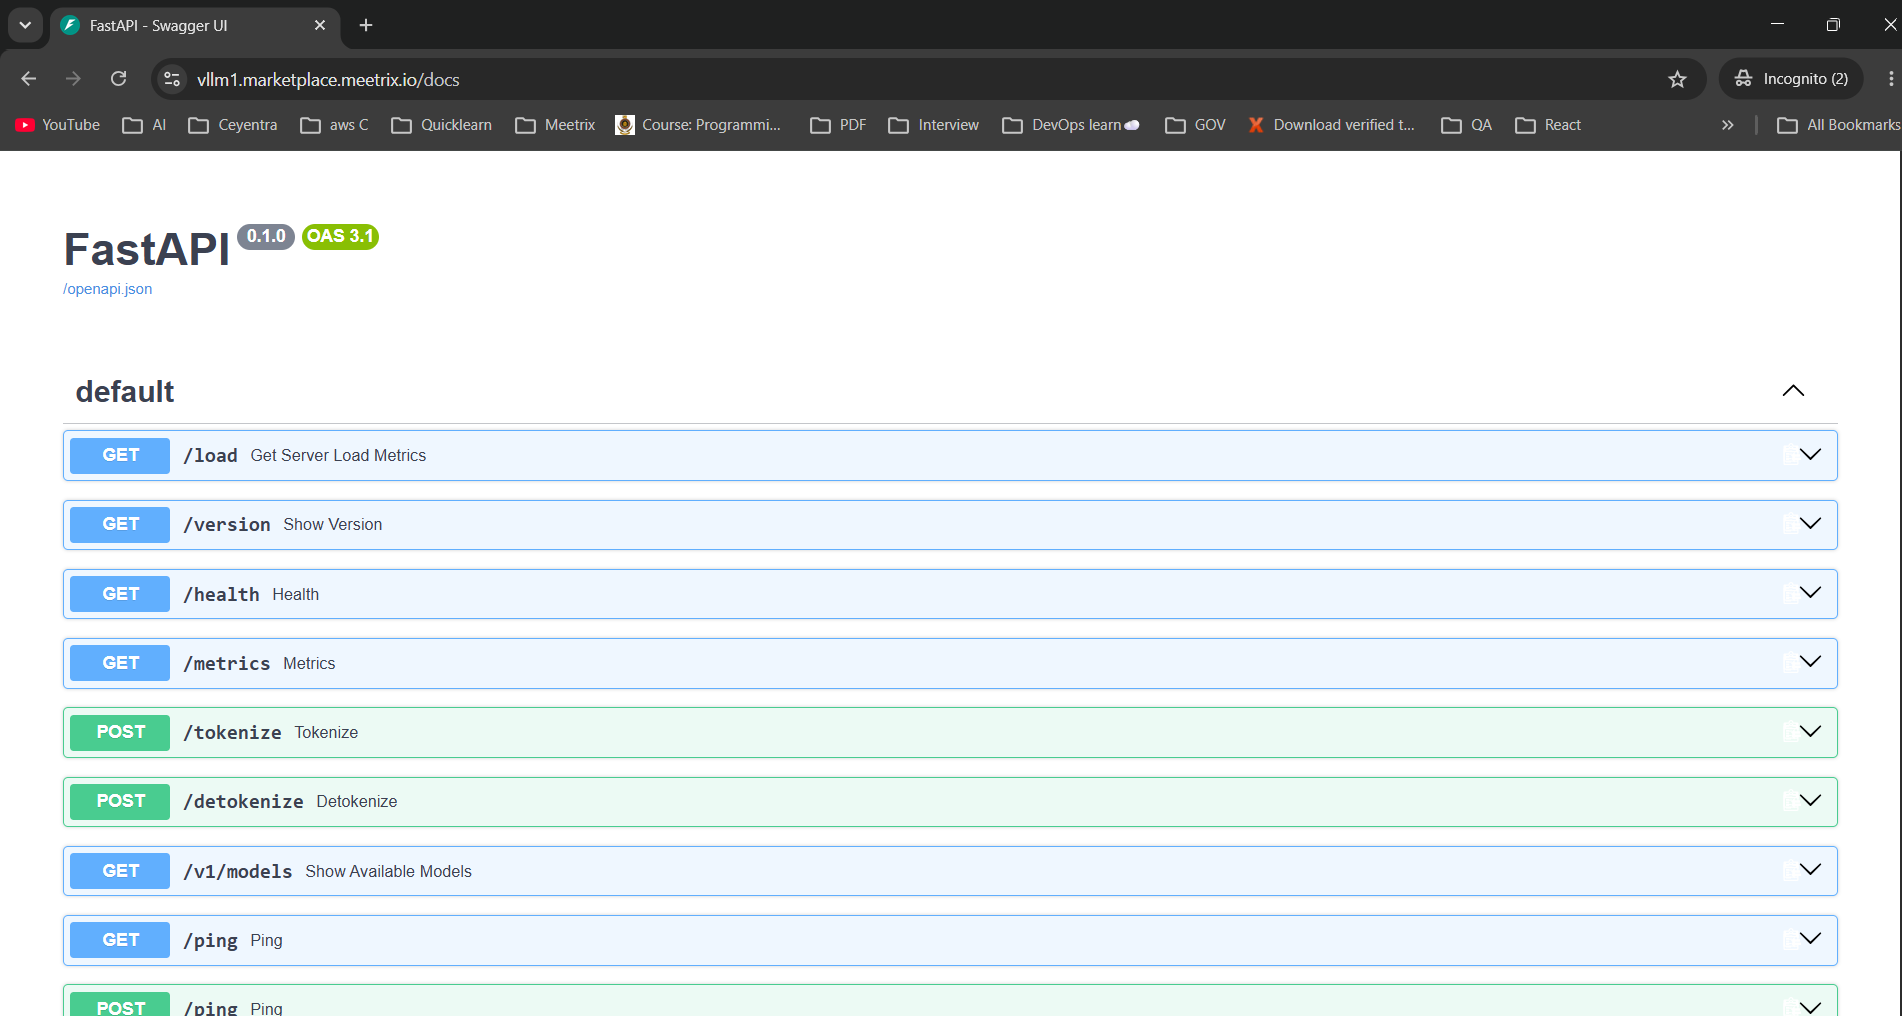
Open the SwaggerUI URL from the Outputs tab to see every available route. The server exposes the OpenAI-compatible endpoints such as /v1/models, /v1/chat/completions, and /v1/completions, along with helper routes like /health and /metrics.
Note
Call the API
Send a chat completion request with any HTTP client. Replace the host with your domain or Elastic IP and the model with the one you deployed:
curl https://<your-domain>/v1/chat/completions \
  -H "Content-Type: application/json" \
  -d '{
    "model": "Qwen/Qwen2.5-7B-Instruct",
    "messages": [{"role": "user", "content": "Say hello in one sentence."}]
  }'
Because the API is OpenAI-compatible, you can also point the official OpenAI SDKs at it by setting the base URL to https://<your-domain>/v1.
Secure the endpoint
Generate an SSL Certificate Manually
vLLM tries to issue SSL automatically on first boot for the domain you passed as DomainName. If that fails, for example because DNS had not propagated yet, you can generate it manually.
Step 1: Log in to the Server
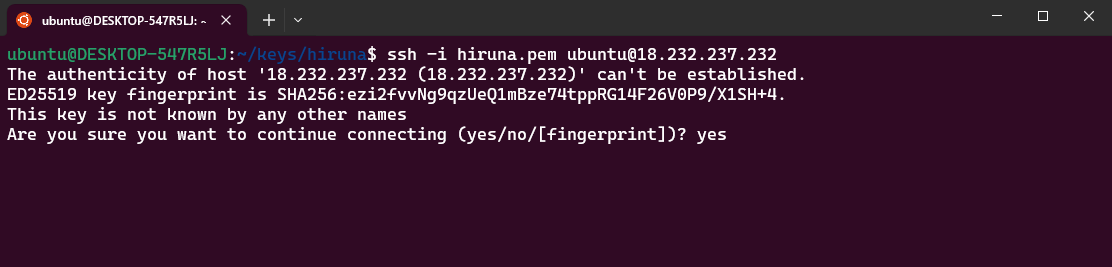
- Open a terminal and go to the directory where your private key is located.
- Run the command below, replacing the placeholders with your key file and the Elastic IP.
- Type "yes" and press Enter to confirm the host's authenticity.
ssh -i /path/to/your-key.pem ubuntu@<ELASTIC_IP>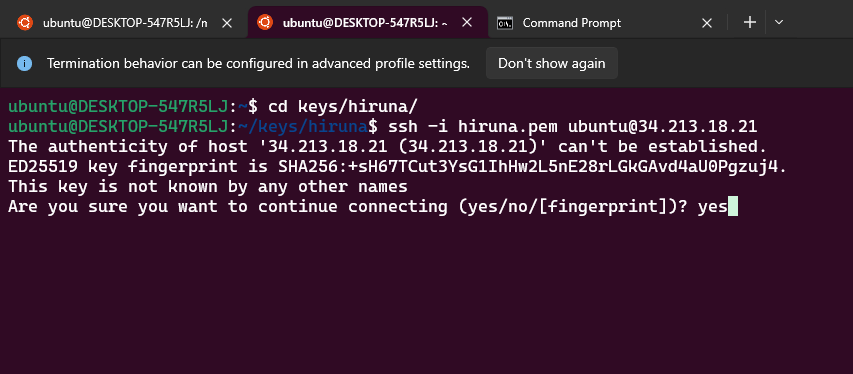
Step 2: Generate SSL
Run the following command and follow the prompts:
sudo bash /root/certificate_generate_standalone.shThis script runs certbot using the domain name and admin email you provided as stack parameters.
Check Server Logs
Step 1: Log in to the Server
ssh -i /path/to/your-key.pem ubuntu@<ELASTIC_IP>Step 2: Inspect the vLLM Service
vLLM runs as a Docker container. Check its status and follow the logs, where you can watch the model download and the GPU worker come online:
sudo docker ps
sudo docker logs -f <container-id-prefix>
To confirm the GPU is visible to the host and see memory use, run:
nvidia-smiManage the Deployment
Stop the Instance
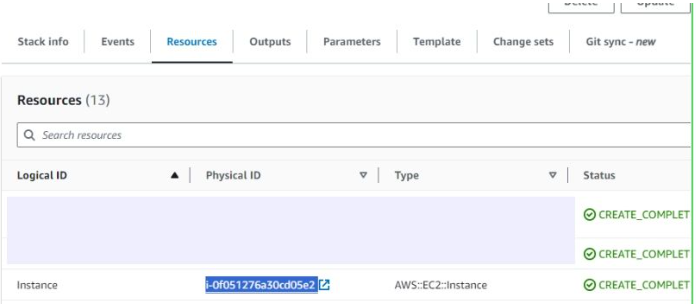
- In CloudFormation, open the "Resources" tab and click the link next to the "Instance" resource to open the EC2 instance.
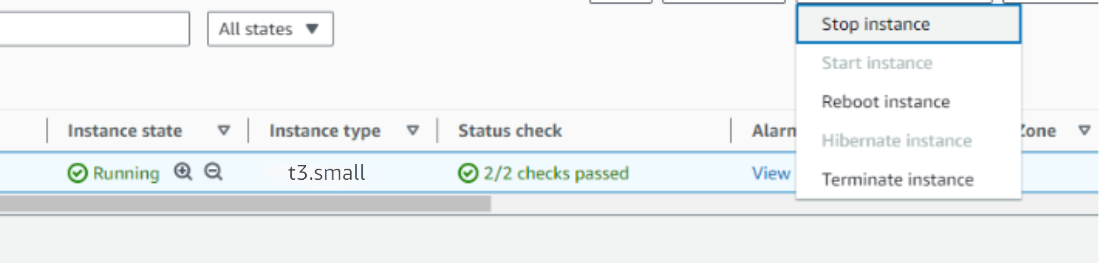
- Stop the vLLM instance from the Instance state dropdown. You can restart it later as needed. Stopping the instance halts GPU billing while keeping the Elastic IP and the root volume.
Remove vLLM
Delete the CloudFormation stack from the AWS Management Console under "CloudFormation Stacks" by clicking "Delete". This removes the instance, the Elastic IP, and the networking resources the stack created.
Upgrades from AWS Marketplace
When a new version is available in AWS Marketplace, remove the previous deployment and relaunch with the new version. Note the model name and any configuration changes first so you can reapply them.
Troubleshoot
vCPU Quota Errors
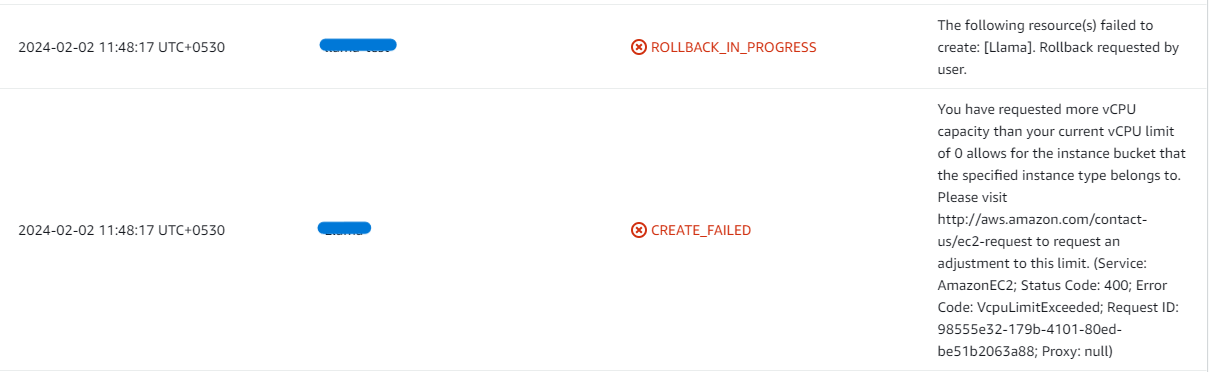
If you hit vCPU quota limits, the stack fails with a VcpuLimitExceeded error and rolls back. G-family instances use a separate "Running On-Demand G and VT instances" quota that is often zero on new accounts. Request an increase by following How to increase AWS quota.
Insufficient Capacity Errors
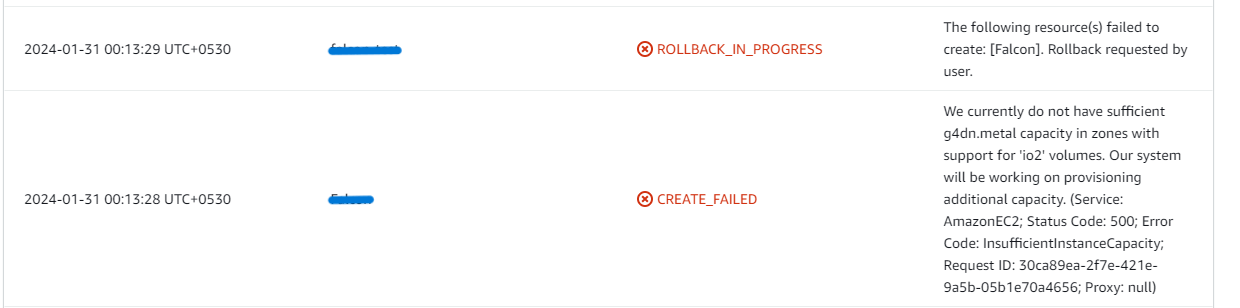
If you see an InsufficientInstanceCapacity error while creating the stack, the GPU instance type is not available in that Availability Zone right now. Try a different instance type, Availability Zone, or region.
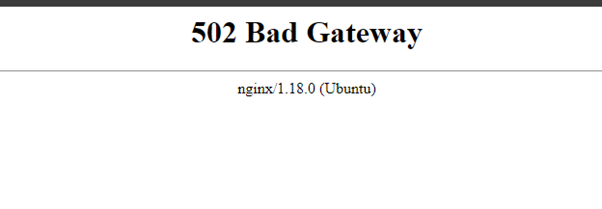
502 Bad Gateway
If the API is temporarily inaccessible, wait 5-15 minutes and retry. On first boot vLLM downloads the model weights and loads them onto the GPU before it starts answering.
Model Fails to Load
If the logs show an out-of-memory error, the model is too large for the GPU. Choose a smaller model, a quantized build, or a larger instance type. For gated models, confirm the HuggingFaceToken parameter was set and the account has accepted the model's license.
SSL Did Not Issue
Confirm your DNS record points at the Elastic IP and has propagated, then re-run the certificate script from the "Generate an SSL Certificate Manually" section.
Disk Space
Model weights are large, so a full root volume can stop vLLM from starting. Check usage:
df -h
If the root volume is between 90-100%, resize the EBS volume (per AWS docs), then reboot and restart the service.
Conclusion
The Meetrix vLLM Deployment Guide gets a high-throughput, OpenAI-compatible inference server running on your own AWS account in minutes. Once it is up, you point any OpenAI SDK or tool at a single endpoint, serve the open model of your choice on your own GPU, and keep your prompts and data inside your account.
Technical Support
Reach out to Meetrix Support (support@meetrix.io) for assistance with vLLM deployment issues.
Frequently Asked Questions
What is vLLM?
vLLM is an open-source inference and serving engine for large language models. It uses PagedAttention to manage the KV cache efficiently, which gives it high throughput and low latency under concurrent load. It also exposes an OpenAI-compatible HTTP API, so tools and SDKs written for the OpenAI API can talk to your self-hosted model without code changes.
What are the prerequisites for running vLLM on AWS?
You need basic knowledge of AWS services (EC2, CloudFormation), an active AWS account with permission to create EC2, VPC, IAM, and CloudFormation resources, an EC2 key pair, and a GPU vCPU quota high enough to launch a G-family instance. A domain with a Route53 hosted zone is optional but needed for automatic SSL. A Hugging Face access token is needed only for gated or private models.
Which instance type should I choose?
vLLM needs an NVIDIA GPU, so pick a G-family instance. g5.2xlarge (one A10G, 24 GB of GPU memory) is a good default for 7B to 8B models. Move up to g5.12xlarge or g6e sizes for larger models or higher concurrency. CPU-only instances will not work.
How do I change the model that vLLM serves?
The model is set by the ModelName stack parameter, using the Hugging Face repository ID, for example Qwen/Qwen2.5-7B-Instruct. To switch models, update the parameter (or the service configuration on the instance) and restart the vLLM service. Make sure the new model fits in the GPU memory of your chosen instance type.
Is the API protected by authentication?
By default the OpenAI-compatible endpoint is open to anyone who can reach it, so restrict access with the SSHLocation and security group settings, put it behind a VPN or a reverse proxy with auth, or run vLLM with an API key. Never expose an unauthenticated endpoint to the public internet.
How do I call the vLLM API from my code?
Point any OpenAI-compatible client at https://your-domain/v1, use the chat completions or completions route, and pass the model name you deployed. The interactive Swagger UI at /docs and the ReDoc page at /redoc list every available route.
How do I get technical support?
Reach out to Meetrix Support at support@meetrix.io for assistance with vLLM deployment issues.
Deploy vLLM on AWS in Minutes
Launch a production-ready, self-hosted vLLM inference server on AWS with a pre-configured Meetrix image and serve open models through one OpenAI-compatible endpoint.
Get Started on AWS Marketplace