Welcome to our comprehensive developer guide for deploying Jitsi Meet on Google Cloud Platform! Jitsi Meet is a powerful, open-source video conferencing solution, and with our pre-configured GCP image, you can get it running in your own GCP environment in minutes.
This guide will walk you through every step, from launching the product to configuring your domain and securing your instance. Let's get started!
Video Guide
Prerequisites
Before you begin, make sure you have the following:
- Basic Google Cloud Platform knowledge.
- An active Google account with a GCP project and billing enabled.
- A domain name you can manage DNS records for.
- If you encounter a vCPU quota error when launching the stack, follow https://meetrix.io/blogs/increase-aws-vcpu-quota/ to increase your vCPU limit.
Not sure how much capacity you need? Our guide on Jitsi Meet server requirements and the 1000 user limit explains how participant counts map to instance sizing. If your users sit behind restrictive networks, you may also need a TURN server for Jitsi Meet to relay media.
Launch the Product
Step 1: Find the Product
- Log in to your Google account.
- Go directly to a product page, for example Jitsi Meet 500 Users on GCP Marketplace.
- You can also browse all Meetrix products at the Meetrix Solutions Page and pick the tier that matches your concurrent user count.
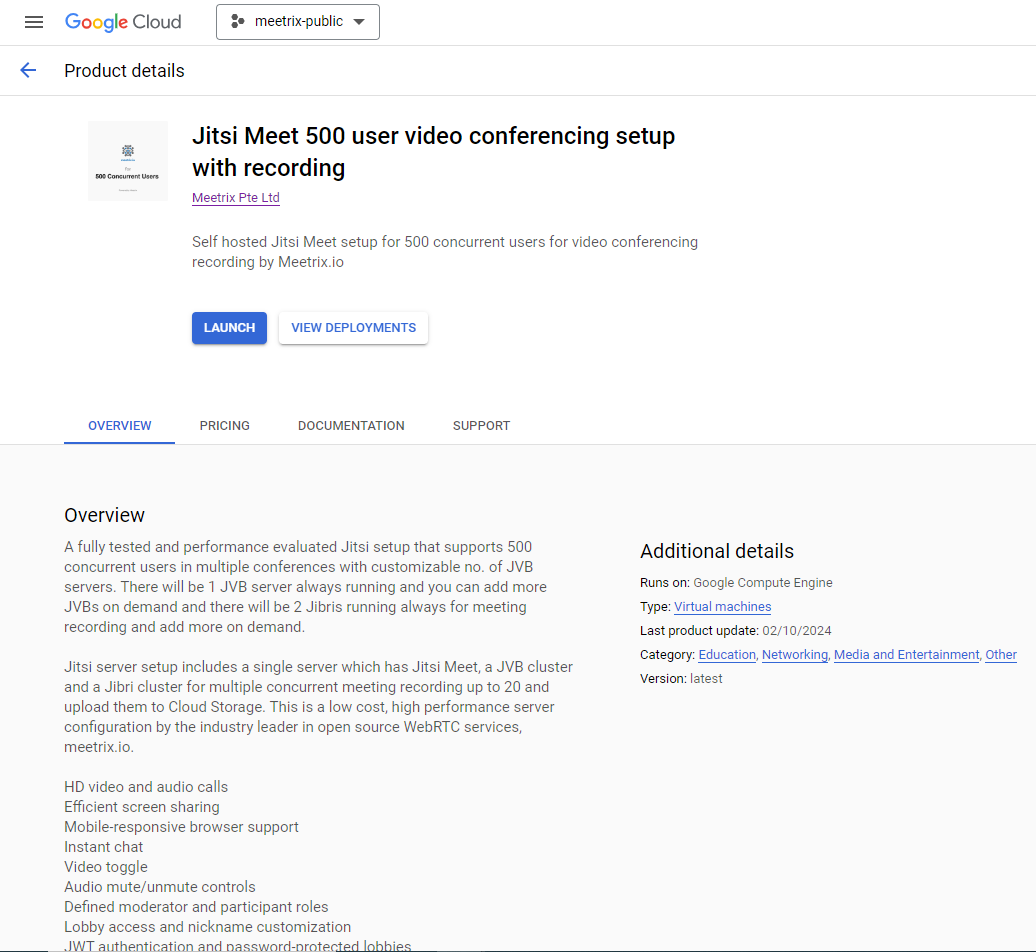
- You will see the product listing page. For this guide, we use the 500 concurrent user setup as the example.
Step 2: Launch the Product
- Select your GCP project from the project selector.
- Review the product description and pricing.
- Click the GET STARTED button.
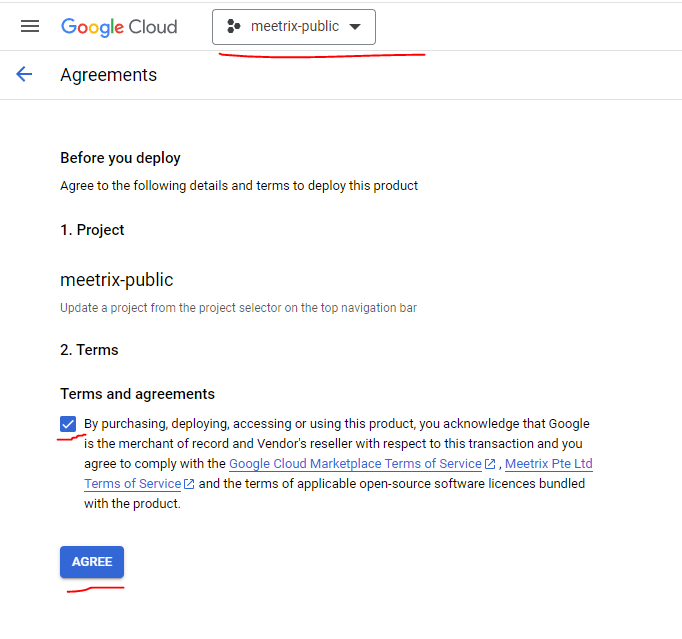
- Select the project, accept the terms, and click AGREE.
Free Trial
This product includes a 5-day free trial with up to USD 50.00 in licence fee credits. To activate it, tick I accept the solution trial Terms and Conditions on the launch screen before proceeding.

Trial note
You will then see the deployment configuration form. Fill in the fields across the following sections.
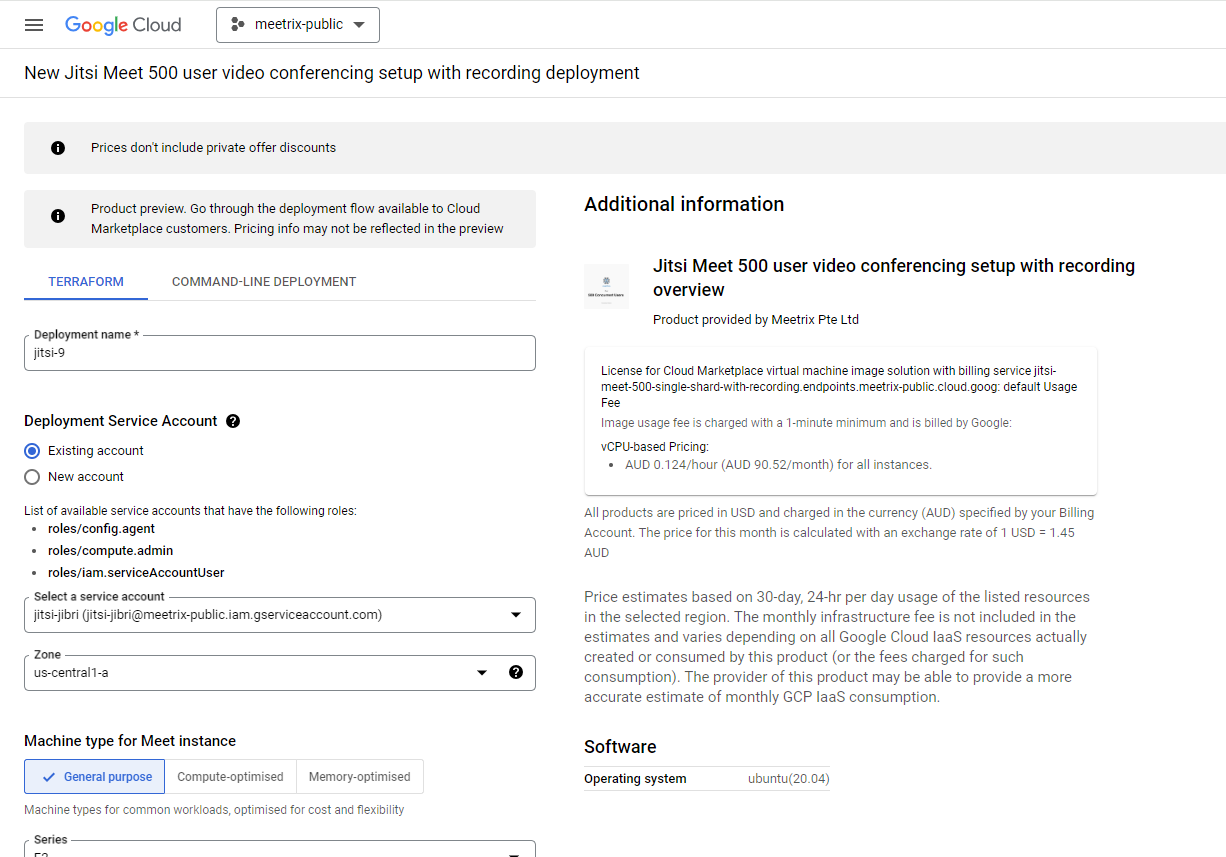
General
- Deployment name - a unique name for this deployment.
- Service account - choose an existing service account or create a new one.
Instance Types
Choose an instance type for Jitsi Meet based on your concurrent user count:
- For 50 or 100 users, Jitsi Meet and the JVB (video bridge) run on a single server, so choose a high-performance server.
- For 250 or 500 users, you can select a general-purpose server for the main instance.
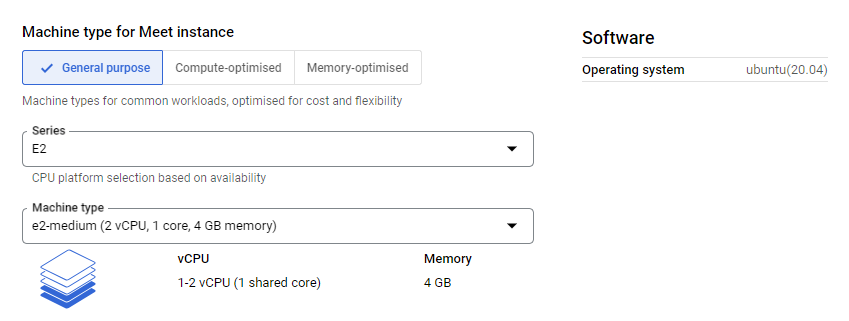
- For 250 or 500 users, the JVBs run as separate servers, so choose an instance type for the JVBs.
- For the 500 user setup, you can also customize the JVB server count.
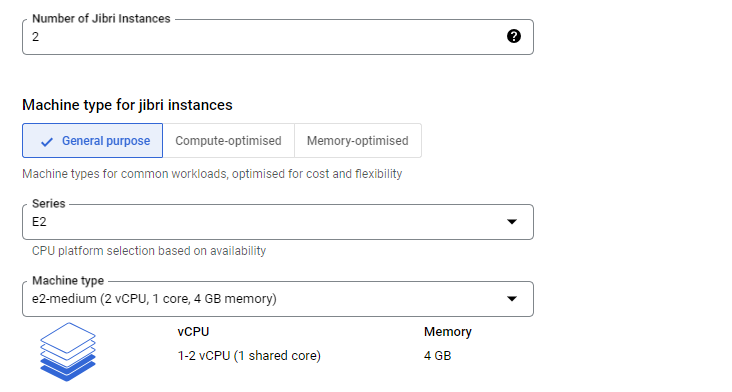
If your product includes Jibri (recording), select the preferred instance type for Jibri. On the 500 user product you can also customize the number of Jibri instances.
Domain and SSL
- Domain - the domain name you will use for this Jitsi Meet instance.
- Admin email - used to install the SSL certificate via Let's Encrypt.
Storage and Networking
- Cloud Storage bucket - create a bucket separately to store Jibri recordings and add its name here. This applies only to Jibri (recording) setups.
- Boot disk size - customize as needed.
- Firewall settings - to restrict SSH access, add the IP or IP range you want to allow.
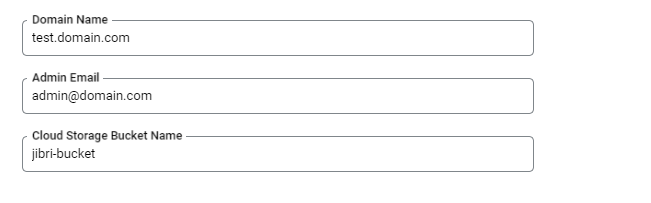
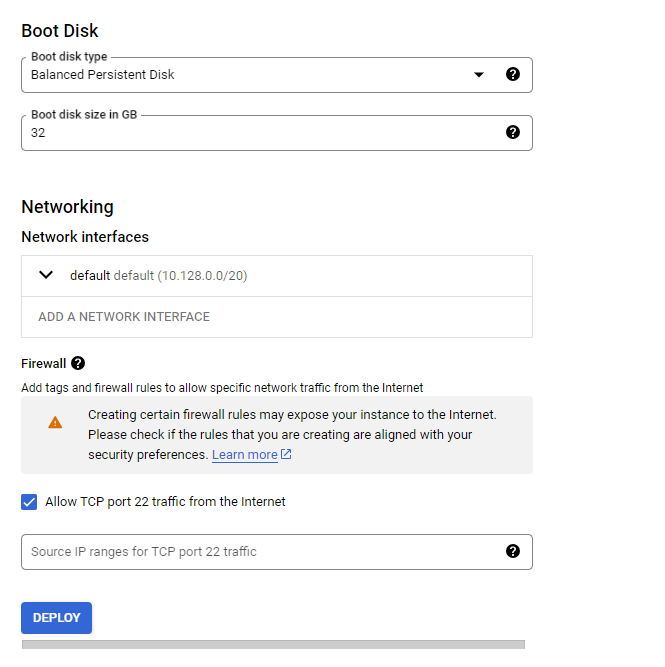
Click DEPLOY and wait several minutes until the deployment is finished.
Install SSL
Step 1: Point DNS
- After the deployment is ready, click on the Compute Engine resource name.
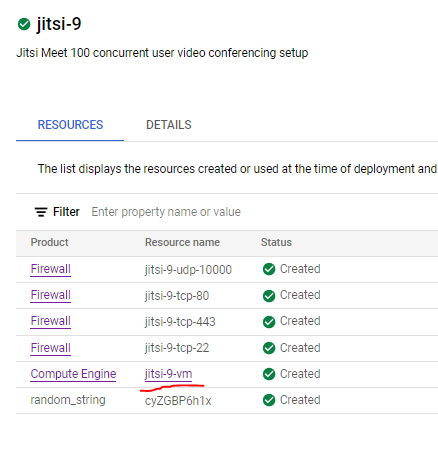
- Copy the External IP under the Network interfaces section.
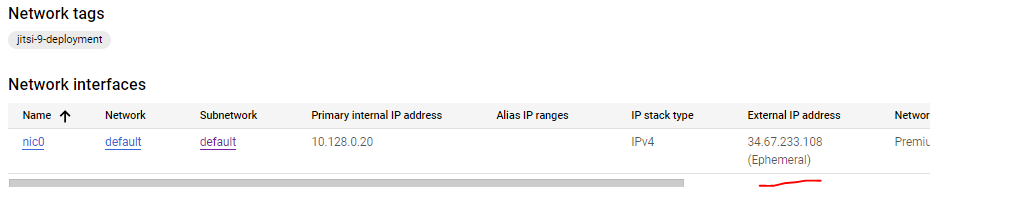
- Go to your DNS provider and add a simple A Record pointing the Jitsi domain to the copied IP.
Step 2: Access the Server
- In the VM instance page, click on SSH.
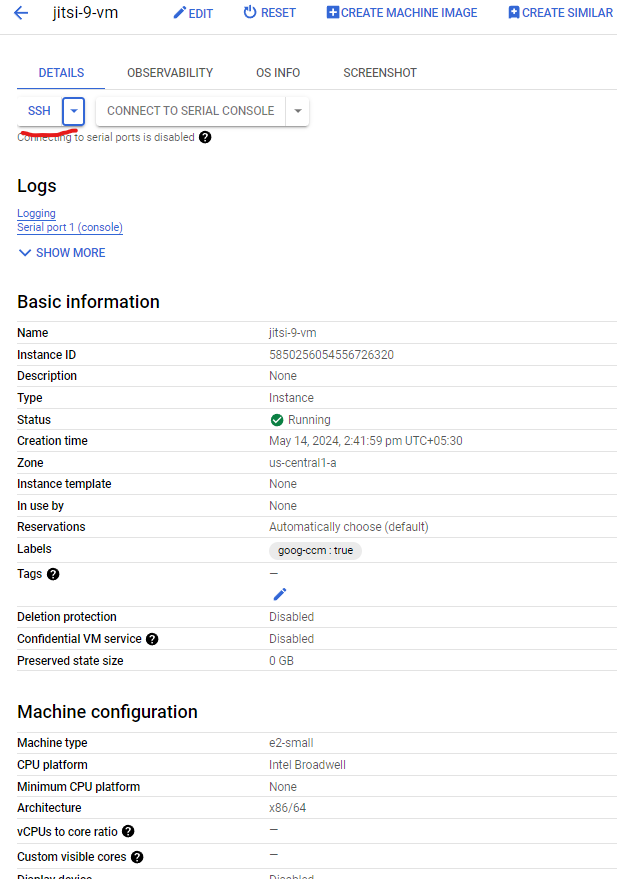
- Authorize and continue to log into the server.
Step 3: Run Certbot
- Type the following command and continue:
sudo certbot --nginx
Follow the instructions accordingly:
- Add email.
- Agree to the Terms and Conditions.
- Agree/Disagree to share email with foundation.
- Select the domain name.
SSL Installed Successfully
Step 4: Start a Meeting
Open a new browser tab using the domain and enjoy Jitsi Meet.
Manage the Server
Stop and Start the VM
To pause the instance without deleting it, go to Compute Engine, then VM instances in the GCP console, select your instance, and click Stop. Click Start to bring it back online. Stopping the VM pauses compute charges but keeps the boot disk and its data.
Delete the Deployment
To fully remove the deployment and stop all billing:
- Go to Solution deployments in the GCP console.
- Find your Jitsi Meet deployment.
- Click Delete to remove all associated resources.
Recordings are stored separately
Customize the Front End
Once your server is running, brand it with your own logo, colors, and app name:
Troubleshoot
Check the Server Logs
To check logs, log into the server and use the following commands:
sudo tail -f /var/log/jitsi/jicofo.log
sudo tail -f /var/log/prosody/prosody.log
sudo tail -f /var/log/prosody/prosody.err
sudo tail -f /var/log/nginx/access.log
sudo tail -f /var/log/nginx/error.log
sudo tail -f /var/log/syslog
sudo tail -f /var/log/jitsi/jvb.log
Check Console Logs
You can open the browser console in the meeting page and check for any visible errors.
Technical Support
If you run into any issues, our support team is here to help. Reach out to us at aws@meetrix.io.
Frequently Asked Questions
Can I use my own domain name?
Yes. This guide walks you through configuring your own domain name and setting up SSL certificates for it.
What are the minimum instance requirements for Jitsi Meet?
For a small to medium setup (up to 100 users), we recommend a high-performance server. For larger setups (250-500 users), you can use general-purpose servers with separate JVB instances.
How do I handle SSL certificate renewal?
SSL certificates generated with Let's Encrypt need to be renewed every 90 days. You can set up automatic renewal or manually renew using the certbot command.
What should I do if deployment takes too long?
Deployment typically takes 5-10 minutes. If it takes longer, check the deployment logs in the GCP console for any errors or issues.
Does the Jitsi Meet GCP image include a free trial?
Yes. Each Meetrix Jitsi Meet product on the GCP Marketplace includes a 5-day free trial with up to USD 50.00 in licence fee credits. You only pay standard GCP infrastructure costs during the trial, plus the Meetrix licence fee once it ends.
What is the difference between the 50, 100, 250, and 500 user products?
The number reflects the concurrent participant capacity the setup is sized for. The 50 and 100 user products run Jitsi Meet and the JVB (video bridge) on a single server, while the 250 and 500 user products run one or more JVBs on separate servers for higher capacity. Each tier is also available with recording (Jibri) included.
Does this image support recording?
Recording is available on the '+ recording' variant of each product tier, which bundles Jibri. During deployment you select a Jibri instance type and provide a Cloud Storage bucket name where recordings are saved.
How do I stop being billed for the deployment?
Stopping the VM from Compute Engine pauses compute charges but keeps the disk. To remove all resources and end billing completely, delete the deployment from the Solution deployments page in the GCP console.
How do I upgrade to a larger user capacity later?
To move to a larger tier, deploy the higher-capacity product from the Marketplace, point your DNS A record to the new instance, and reissue SSL with certbot. Reach out to support@meetrix.io if you need help migrating configuration or recordings.
Ready to Launch Your Own Video Conferencing Platform?
Get started in minutes with our pre-configured GCP image and take control of your video conferencing.
Deploy Jitsi Meet from GCP Marketplace