
Welcome to the Meetrix MongoDB Developer Guide!
This guide is designed to assist you in seamlessly integrating MongoDB into your AWS environment through detailed, step-by-step instructions.
Video
Prerequisites
Before you get started with the MongoDB AMI, ensure you have the following prerequisites:
- Basic knowledge of AWS services, including EC2 instances and CloudFormation.
- An active AWS account with appropriate permissions.
- Enough vCPU limit to create instances
- (Follow this guide to ensure this)
Launching the AMI
Step 1: Find and Select AMI
- Log in to your AWS Management Console.
- Navigate to the "MongoDB" in AWS Marketplace.
Step 2: Initial Setup & Configuration
- Click the "Continue to Subscribe" button.
- After subscribing, you will need to accept the terms and conditions. Click on "Accept Terms" to proceed.
- Please wait for a few minutes while the processing takes place. Once it's completed, click on "Continue to Configuration".
- Select the "CloudFormation Template" as the fulfilment option and choose your preferred region on the "Configure this software" page. Afterward, click the "Continue to Launch" button.
- From the "Choose Action" dropdown menu in "Launch this software" page, select "Launch CloudFormation" and click "Launch" button.
Create CloudFormation Stack
Step1: Create stack
- Ensure the "Template is ready" radio button is selected under "Prepare template".
- Click "Next".
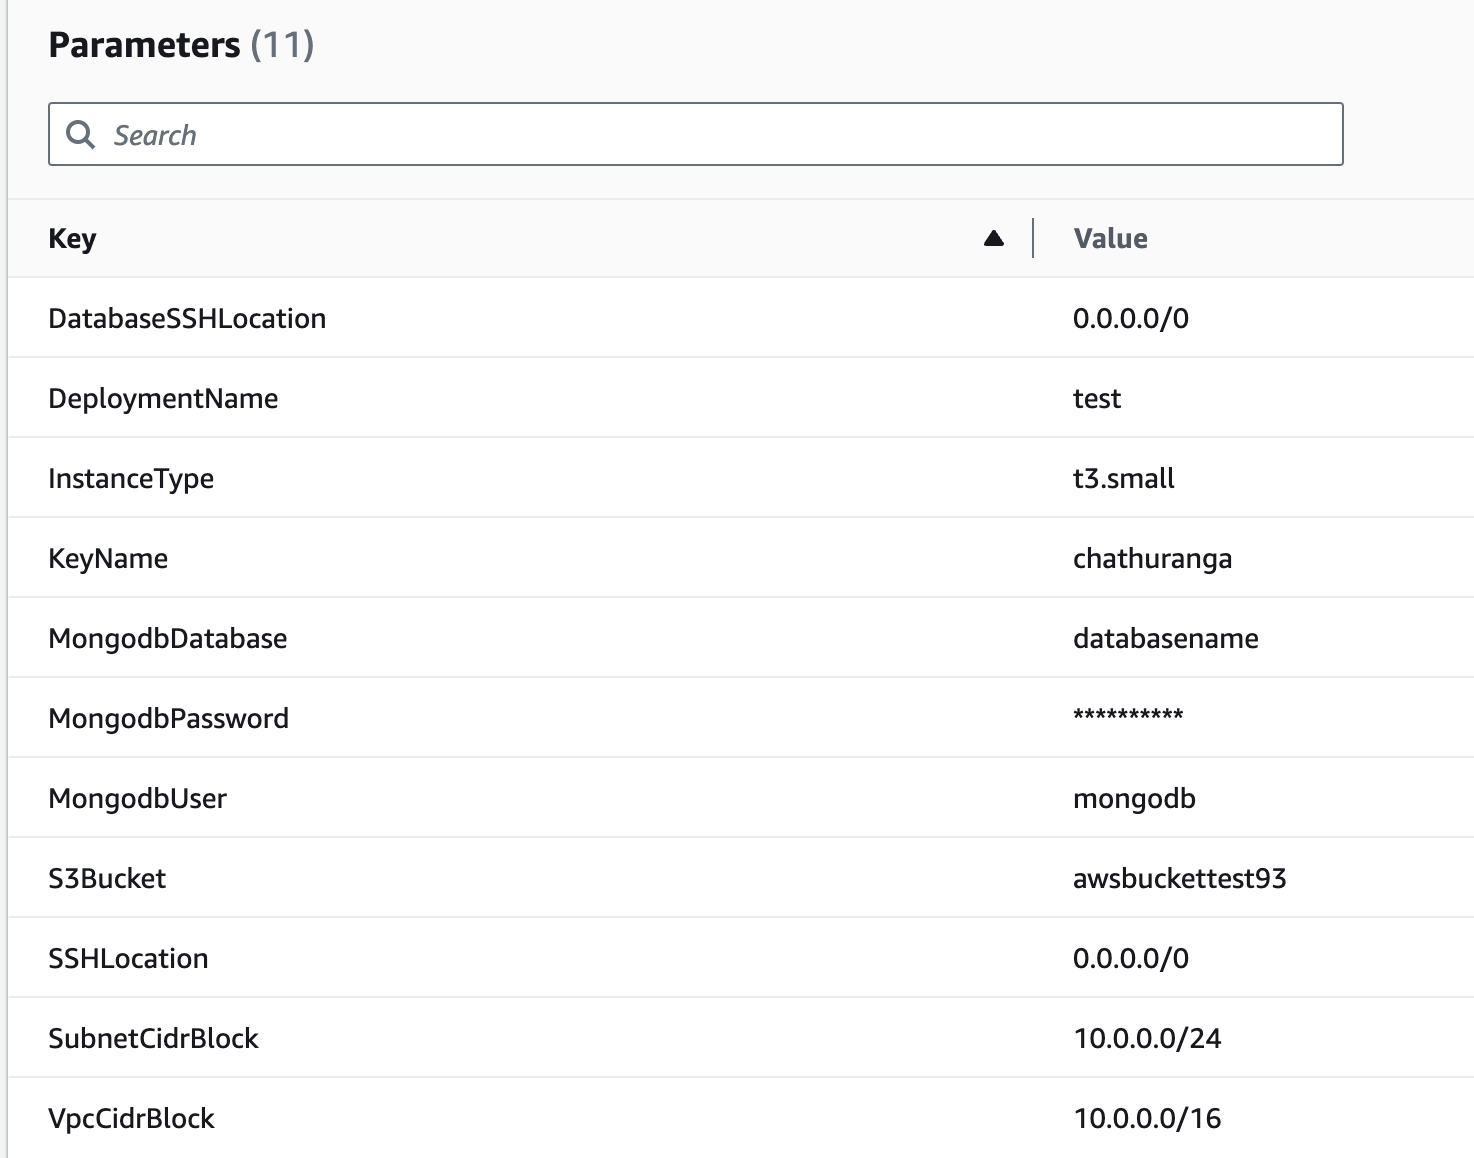
Step2: Specify stack options
| Parameter | Description |
|---|---|
| Stack name | A unique name for your CloudFormation stack. |
| DatabaseSSHLocation | 0.0.0.0/0 |
| DeploymentName | A name of your choice for the deployment. |
| InstanceType | The EC2 instance type (Recommended: t3.small). |
| KeyName | Your preferred key pair name. |
| MongodbDatabase | Your desired database name. |
| MongodbPassword | A strong password for the database. |
| MongodbUser | Your desired database username. |
| S3Bucket | An existing S3 bucket name for storing backups. |
| SSHLocation | 0.0.0.0/0 |
| SubnetCidrBlock | 10.0.0.0/24 |
| VpcCidrBlock | 10.0.0.0/16 |
Click "Next".
Step3: Configure stack options
- Choose "Roll back all stack resources" and "Delete all newly created resources" under the "Stack failure options" section.
- Click "Next".
Step4: Review
- Review and verify the details you've entered.
- Tick the box that says, "I acknowledge that AWS CloudFormation might create IAM resources with custom names".
- Click "Submit".

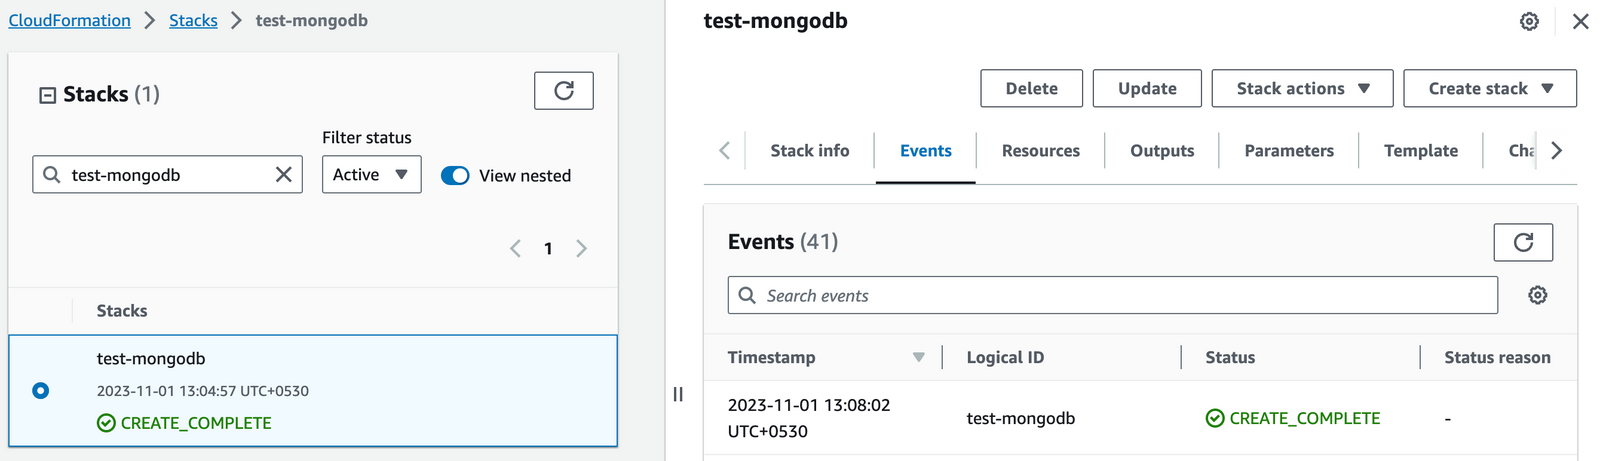
Afterward, you'll be directed to the CloudFormation stacks page.

Please wait for 5-10 minutes until the stack has been successfully created.
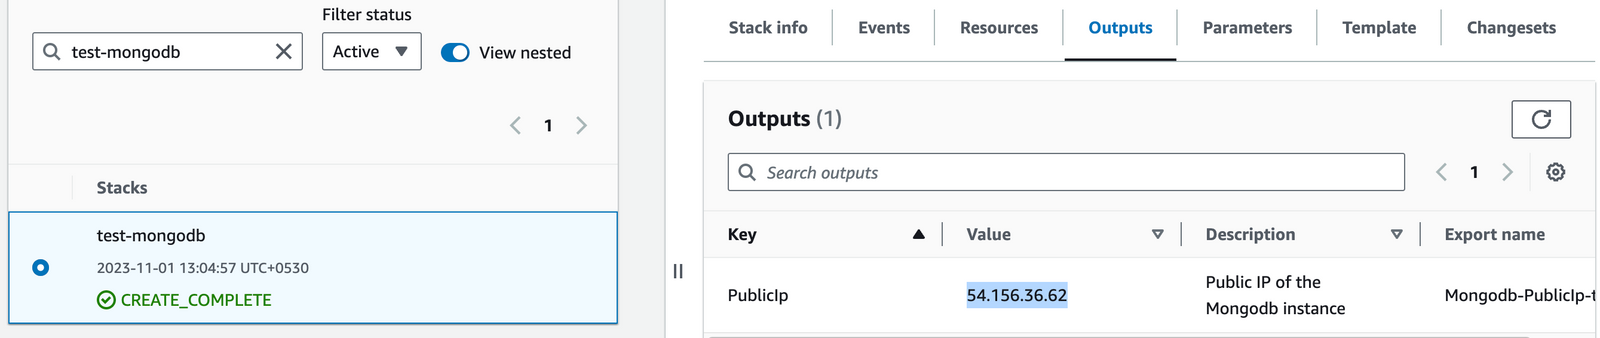
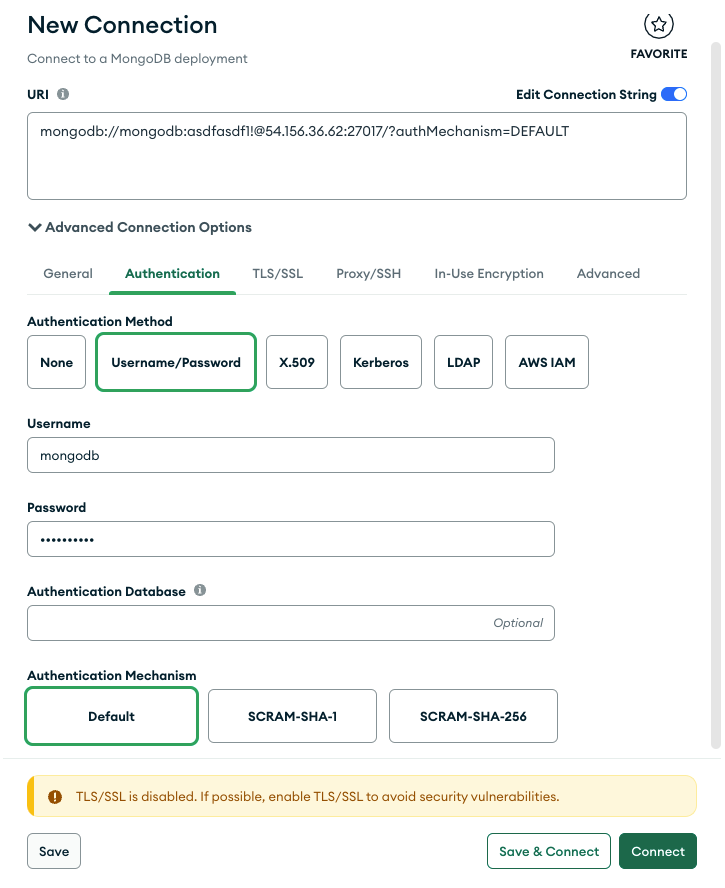
Connect to the Database
- To obtain the IP address, navigate to the "Outputs" tab and look for "PublicIp".
- Use "MongodbUser" as the username and "MongodbPassword" as the password, which are entered in "Step2: Specify stack options" within the "Create CloudFormation Stack" section.
- You can access the database via port 27017.
(Access MongoDB using MongoDB compass beta)
Remove MongoDB
- Delete the stack that has been created in the AWS Management Console under 'CloudFormation Stacks' by clicking the 'Delete' button.
Upgrades
When there is an upgrade, we will update the product with a newer version. You can check the product version in AWS Marketplace. If a newer version is available, you can remove the previous version and launch the product again using the newer version. Remember to backup the necessary server data before removing.
Troubleshoot
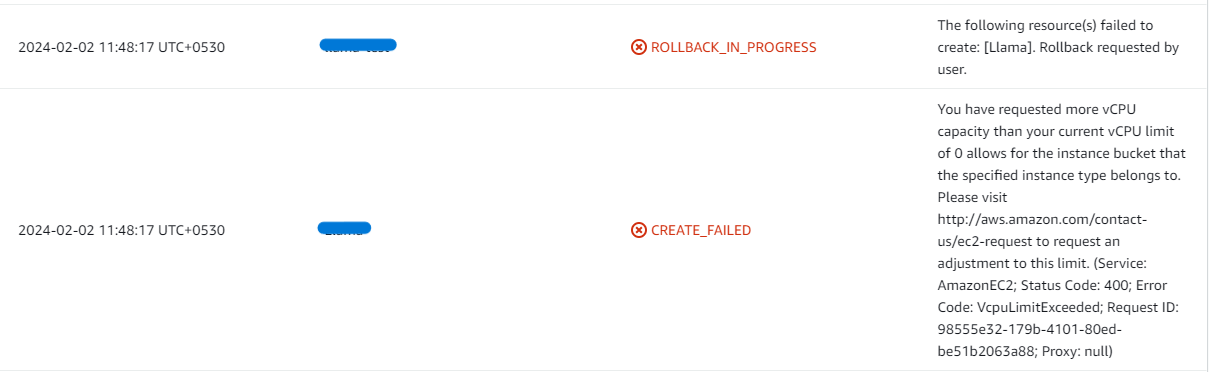
vCPU Quota Error
If you face the following error, please follow this guide to increase vCPU quota.
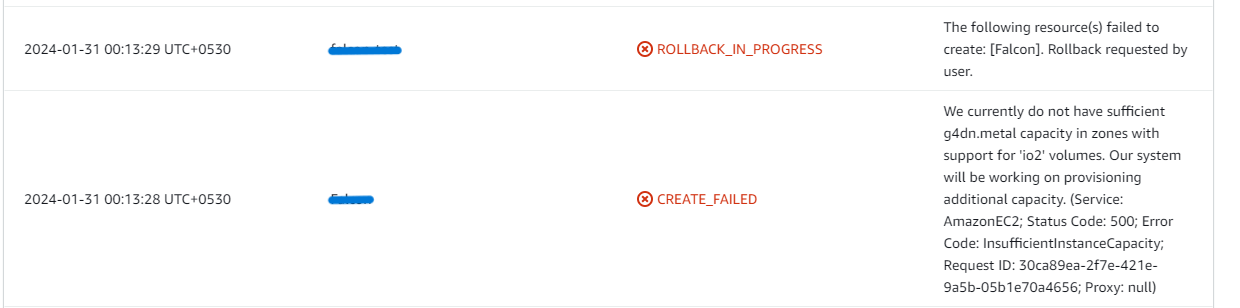
Insufficient Capacity Error
If you face the following error (do not have sufficient <instance_type> capacity...) while creating the stack, try changing the region or try creating the stack at a later time.
API Dashboard Error
If you face the below error, when you try to access the API dashboard, please wait 5-10 minutes and then try.

Conclusion
The Meetrix MongoDB Developer Guide provides comprehensive support for seamlessly integrating MongoDB into your AWS environment with detailed, step-by-step instructions. MongoDB, the leading NoSQL database, offers an open-source, document-oriented approach that diverges from traditional relational databases. Utilizing BSON format for storage, MongoDB supports dynamic schemas, embedded documents, and arrays, which streamline data management and enhance performance without requiring complex joins.
Technical Support
Reach out to Meetrix Support (aws@meetrix.io) for assistance with MongoDB issues.
Frequently Asked Questions
How do I connect to my MongoDB instance?
You can connect using the Public IP and port 27017, along with the DB User, DB Password, and DB Name specified during CloudFormation stack creation.
How can I back up my MongoDB data?
Automated daily backups are configured to an S3 bucket specified during setup. For manual backups, you can use standard MongoDB backup tools.
What should I do if I encounter a vCPU quota error?
If you see a vCPU quota error, you need to request a quota increase via the AWS Service Quotas console.
How do I upgrade my MongoDB instance?
To upgrade, check the AWS Marketplace for updated AMI versions, back up your data, and then re-launch the stack with the new AMI version and restore your data from backup.
Ready to Launch Your Own MongoDB Instance?
Get started in minutes with our pre-configured AMI and take control of your database.
Deploy MongoDB from AWS Marketplace